Tools and Apps!
This is a list of tools, apps, and resources that can be used to enrich and support a number of classroom lessons and projects. Included are Padlet, Green Screen by Do Ink, Chatterpix, Kahoot, Flipgrid, and Word Clouds.
Padlet
Padlet is like an online bulletin board that can display information. It appears like "sticky notes." Students and teachers can post comments, ideas, and questions. Additional links such as videos, voice recordings, images, and pdfs can also be uploaded. There are numerous possibilities! Padlet is free, however an account can only have 3 active accounts with the free version. Considering that they are very quick and easy to make I use the free version.
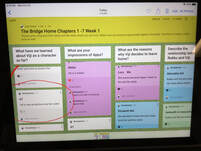
The image above is a Padlet that was shared with me by a teacher who created one for the Global Read Aloud. My students were able to join, answer questions, and view responses from hundreds of other students their age. It was was a powerful learning experience that generated deep discussion. The circled response was from one of my students.
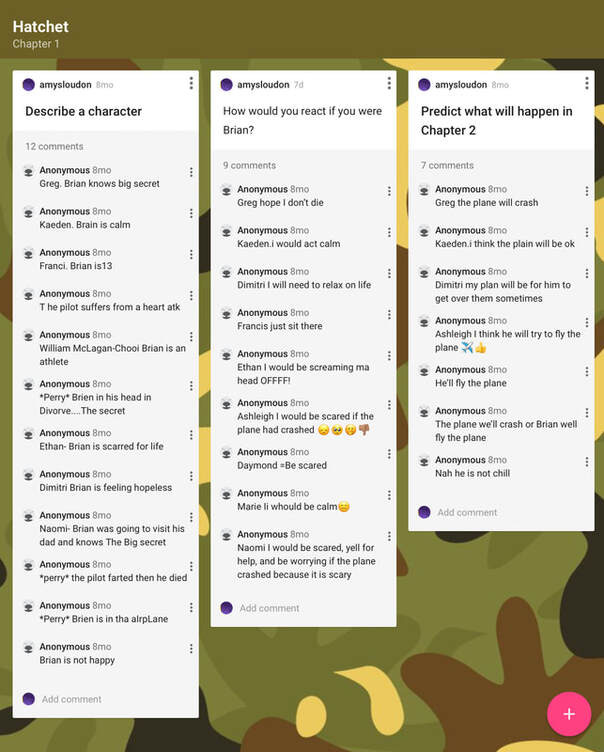
Below is another example that I created for a Grade 5/6 class, reading the novel Hatchet.
Some ways to use Padlet in the classroom:
- Brainstorming ideas
- Sharing big ideas during a novel or read-aloud
- Posting questions during a lesson
- For recall (sometimes I'll start with this as reading review)
- Ticket out the door
- To post unknown words
- Note-taking
For a more detailed list of what Padlet can be used for click here.
|
|
Click here to see my tutorial video on how to create a padlet.
|

I use the Qrafter app to share my padlets to student ipads.
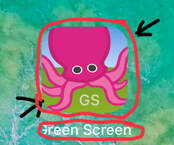
The icon is circled in this image. It is on all of our school ipads.
It's very simple, the steps are as follows:
1)Open Qrafter
2)Hit the button : "Scan with Camera"
3)Take picture of the QR code on my padlet (multiple students can do this at the same time!)
4)Press "Go to URL" The padlet will now be on the student ipad
Green Screen by Do Ink
The green screen effect works by combining images from two sources into a single image or video. There are multiple apps that use the green screen effect. For our project we used Green Screen by Do Ink, which costs $3.99 from the app store, and is on some of our school ipads.
This one was the trickiest app for me, as I had no previous experience with Green screen before November. I took the advice from Kayla Delzer and let my students lead me with this project. It worked fabulously!
I worked with two Grade 6 students who are keen to work with technology.
This is how we did it:
Step 1-Set up the green screen background (we have one!)
Step 1-Open DoInk app and watch the tutorial video (1 min)
Step 2-Select a topic for the movie (choose something familiar for the first time)
Step 3)-Write/decide script
Step4)-Record your video with the basic ipad camera app
Step5)-Choose your background(s)-use you ipad camera (they chose a few pictures)
Step6)-Open DoINk app: Add background picture to bottom row. Add first video to middle row. After adding the first video, slide it over to allow the second video to be added. Props can be added on the top row. Follow this process until all videos are imported on the same line (Finegan)
Step7)-Edit Video, following prompts on the tutorial.
This is a great app using the students teach students model!
The two students who created this video had it figured out very quickly. They used a host of language arts and creative thinking skills and worked collaboratively to create this project. They are proud of their work and inspired to help other students create a video.
Click here to access the Do Ink website with tutorials.
|
|
Click this video to see the Green Screen project that these Grade 6 students created. In total, they spent approximately 3 hours to create this, from start to finish. |
Flipgrid
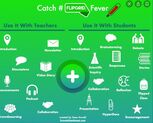
Flipgrid is described as a social learning platform (Merrill), in which educators can ask questions that students can respond to through video. This can be shared with the teacher and with other students. Teachers can set privacy issues and control who is able to view videos. This app supports learning and teaching in many ways, including:
*It is important to note that our district has very strict rules around using media from the United States. This applies to Flipgrid. There are simple ways around this: ensure that students do not show their face, or identify themselves, or their school. There are emoticons that can be placed over faces, and videos are previewed before uploading online. I am currently using this app with a group of Grade 6/7 students to participate in the Global Read Along. Please see examples below.
Flipgrid is described as a social learning platform (Merrill), in which educators can ask questions that students can respond to through video. This can be shared with the teacher and with other students. Teachers can set privacy issues and control who is able to view videos. This app supports learning and teaching in many ways, including:
- Practicing speaking
- Reading responses
- Participating in the Global Read-Along
- Sharing knowledge and/or opinions
- Brainstorming
*It is important to note that our district has very strict rules around using media from the United States. This applies to Flipgrid. There are simple ways around this: ensure that students do not show their face, or identify themselves, or their school. There are emoticons that can be placed over faces, and videos are previewed before uploading online. I am currently using this app with a group of Grade 6/7 students to participate in the Global Read Along. Please see examples below.
|
|
Example #1 was made by me. We shared this with a class in Ohio. I made this during my lunch hour as an example for my students.
This video clip took me about 5 minutes to create. |
|
|
Example 2 is made by a Grade 7 student, who is sharing why she is excited to read the novel The Bridge Home, for the Global read along. She put this flipgrid video together in about 15 minutes. This was her third take, and the one she chose to use. Speaking aloud is something she finds difficult and she found that this tool was helpful for her as she practiced. |
Kahoot!
Kahoot is a class favourite. It is a game-based learning platform used to create and play quizzes or learning games. They can be used from a laptop, ipad or mobile device. Kahoots can be created in minutes, and are free. It is an excellent tool for recall/comprehension (show what you know!) or to identify background knowledge (what do you know?)
After students are familiar with using Kahoot, I like to have them help me create Kahoots. This means students must understand the content in order to create good questions and answers. I did this with a group of Grade 6/7 students and we were able to share and receive Kahoots with another class in a different country. This was very powerful learning.
|
|
Click here to see my tutorial video on how to create a Kahoot! |
For more ways to use Kahoot in your classroom check out this article "12 Ways to Use Kahoot! In Your Classroom."

Chatterpix
This is an app that allows students to take a picture and animate the image with their voice. The student simply snaps a picture, draws a line to add a mouth, presses record and has 30 seconds to speak. Filters and icons can be added for different effects.
This is an app that allows students to take a picture and animate the image with their voice. The student simply snaps a picture, draws a line to add a mouth, presses record and has 30 seconds to speak. Filters and icons can be added for different effects.
|
|
Chatterpix is excellent for students who have social anxiety with presentations. It is also a great way to practice reading, writing, and speaking. It allows students an easy and engaging way to practice developing ideas and expressing themselves in a creative format.
|
Possible uses that I foresee working well with a variety of our students :
- Book recommendations/reviews (example below)
- Big ideas from a novel study
- Animated creations (see clay creations example)
- Informative presentation/explaining knowledge
- Facts about places
- An 'All about Me' presentation
|
|
This is an example made by a Grade 1 student, who created a 'clay creature' and then used Chatterpix to bring it to life.
|
|
|
This next example, by a Grade 6 student, is a book review. She made this video in about 10 minutes, without a script. She did two re-takes and decided on this as her final choice.
|
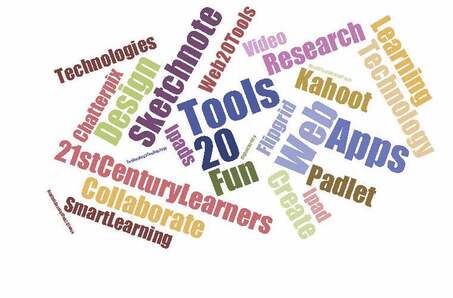
Wordle/ Word Cloud Generator
This is an application that generates "word clouds" from text that relates to a common theme or idea. These are useful tools to visually present ideas or data. Generally, the more times a word is used the bigger the word appears. There are different versions, so I have included a few different options. I selected these options because they are free, can be used on either an ipad or a laptop and, are very easy to use.
The first example below was created using DriveWordCloud, which is a GoogleChrome app. This one takes the traditional form, in which words become larger the more they are used.
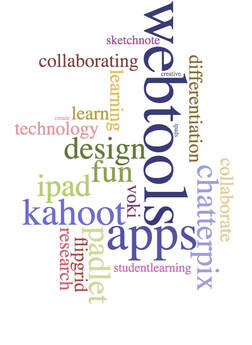
The second option is Word Cloud Generator
This is from Google Docs and is very simple to use. Just type words in Google Text document, click add-ons and select either classic or modern option. Word Cloud can then be exported into a pdf or jpeg. See the example below. I personally preferred this to the first option.
This is from Google Docs and is very simple to use. Just type words in Google Text document, click add-ons and select either classic or modern option. Word Cloud can then be exported into a pdf or jpeg. See the example below. I personally preferred this to the first option.
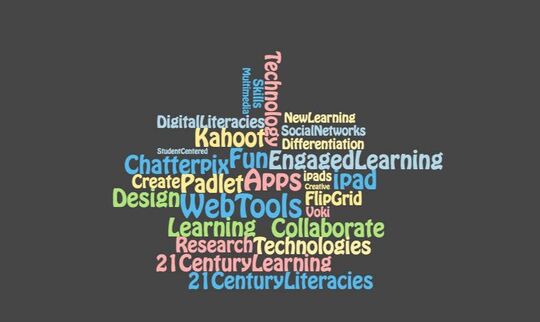
A third option is Edwordle. This option is different from the first two, as the size of the words are selected by the user, instead of by the amount of times a word is typed. Each word only needs to be typed once, which is a time saver, but also serves a different function, or purpose. This is a good choice when trying to make a simple visual for students.
Make sure to check the Udpates: What's New page to see new Tools and Apps that I've added.
